Building an iOS App with Claude Code
A step-by-step tutorial: from idea to running app in one conversation
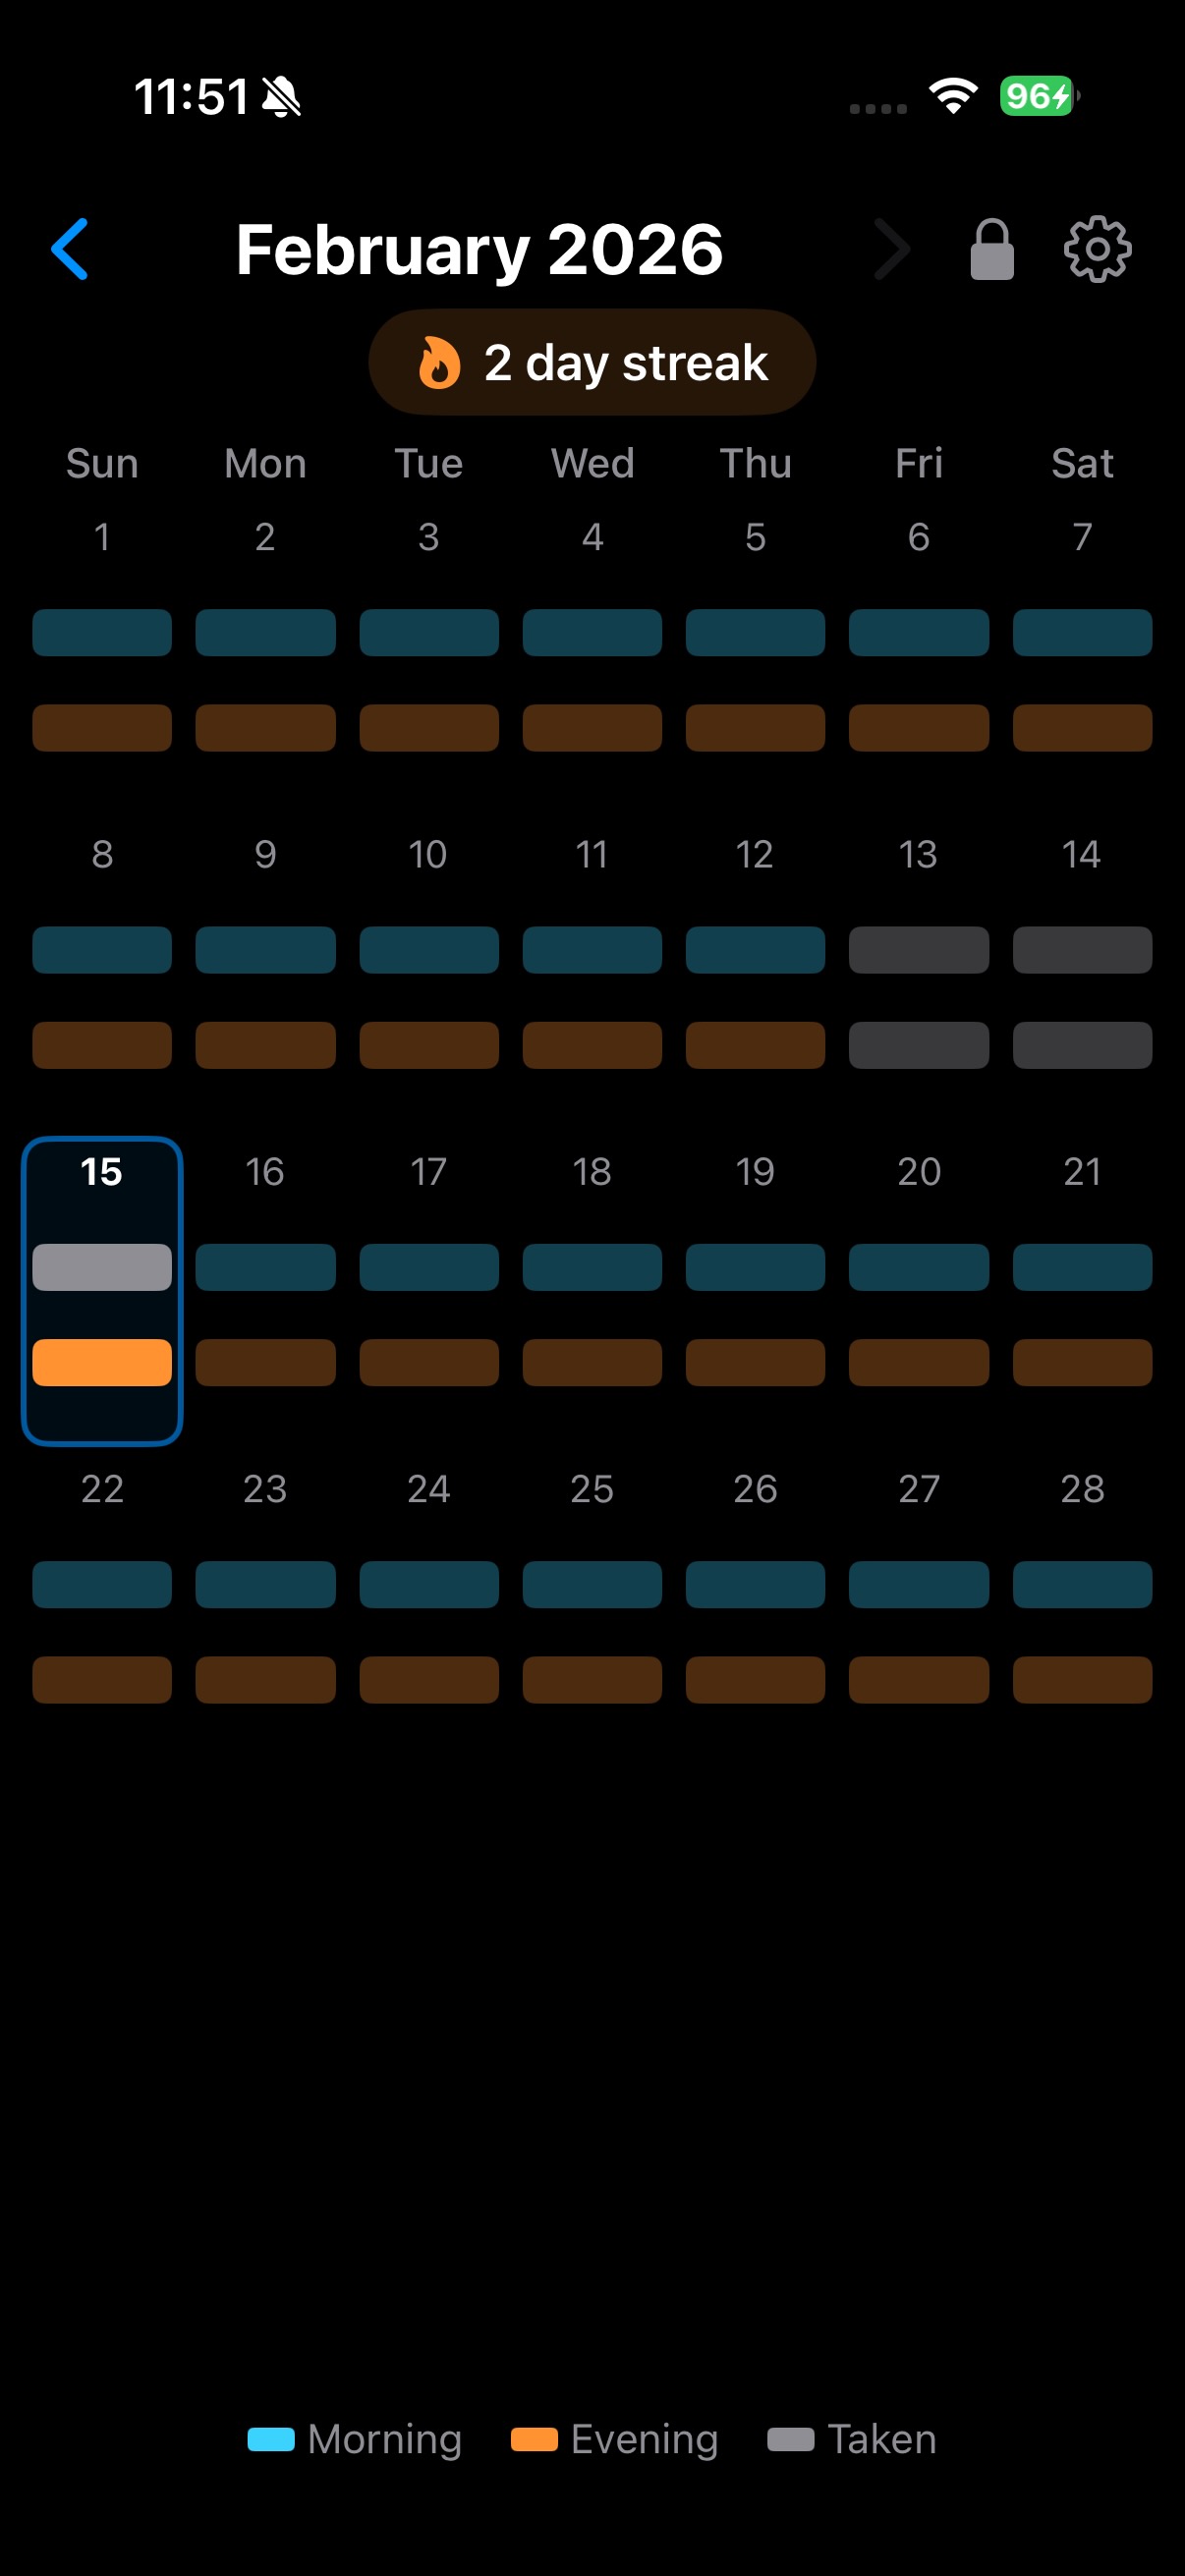
The finished app running on iPhone 16 Pro — built entirely through conversation
This tutorial documents how the Pills app was built entirely through conversation with Claude Code — from the initial idea through to a polished, tested app running on a real iPhone. It covers the initial prompt, design decisions made through interactive Q&A, iterative UI refinements, programmatic icon generation, local notification scheduling with a smart cancellation architecture, unit testing, and debugging a memory issue caused by an inefficient timer. Use it as a template for building your own apps with AI assistance.
Contents
1 Describe Your App Idea
Be specific about what you want, but leave room for AI suggestions
I would like to build an iOS app for iPhone called Pills that helps me keep track of the medication I need to take each day. I would like the app to present a month calendar view for the current month, and on each day show me whether I have yet to take or have already taken my morning and evening pills.
I'm thinking of cyan and orange horizontal bars overlaid on each day in the calendar, that I can tap on to turn grey, meaning I have taken this days. On previous and future days, the bars can still show, but dimmed if I didn't take / haven't taken that day, or grey if I did.
We will need to persist the state of each day (today and the past). I can only tap on today or previous days - I can't tap on future days.
Please create all the files an xcode project will need, set up for my iPhone 16 Pro (currently connected) or prompt me if I need to do any of this. How does this sound? Please ask me questions on anything that is unclear, and please suggest any great ideas you have to enhance this app. Thank you.
What makes this prompt effective:
- Clear purpose - "track medication I need to take each day"
- Visual specificity - exact colours (cyan, orange, grey) and interaction model (tap to toggle)
- State rules - clear logic for past/present/future days
- Technical context - mentions Xcode, iPhone 16 Pro, persistence needs
- Invites collaboration - "ask me questions" and "suggest any great ideas"
Claude suggested several enhancements before writing any code:
- Haptic feedback - satisfying tap feel when marking pills
- Month navigation - swipe or arrows to view previous months
- Streak counter - consecutive days with all pills taken
- Undo support - tap a taken bar again to un-mark it
- Today highlight - visually distinct current day
- Notification reminders - push notifications for morning/evening
- Home Screen widget - at-a-glance today status
It then asked four clarifying questions via an interactive picker.
2 Answer Design Questions
Claude asks targeted questions to avoid assumptions
Before writing a single line of code, Claude presented four multiple-choice questions:
Q1: Minimum iOS version?
- iOS 17+ (Recommended) - chosen. Gives access to SwiftData for persistence.
- iOS 18+ - latest only
- iOS 16+ - broader compatibility
Q2: Should tapping a taken bar toggle it back?
- Yes, toggle back - chosen. Allows fixing accidental taps.
- No, one-way only
Q3: Navigate to previous months?
- Yes (Recommended) - chosen. Swipe left/right for history.
- No, current month only
Q4: Which enhancements to include? (multi-select)
- Haptic feedback - chosen
- Streak counter - chosen
- Today highlight - chosen
- Keep it simple
Claude's interactive questions prevented it from guessing at requirements. Each answer directly shaped the code it wrote. The "Recommended" labels helped guide decisions without being prescriptive.
3 Review the Generated Project
A complete, buildable Xcode project in one pass
Claude created the full Xcode project structure in a single pass:
It then verified the build from the command line:
xcodebuild -project Pills.xcodeproj -scheme Pills \
  -destination 'generic/platform=iOS' \
  build CODE_SIGNING_ALLOWED=NO

** BUILD SUCCEEDED **
The tech stack chosen: Swift 5 SwiftUI SwiftData
Key architecture decisions Claude made:
- SwiftData over UserDefaults or Core Data - modern, minimal boilerplate, integrates natively with SwiftUI
- Single @Query for all records, filtered in code - records are bounded (~365/year), avoiding dynamic predicate complexity
- Callback pattern for toggle actions - DayCellView → CalendarView → ContentView, keeping the model context in one place
- Lazy record creation - no record exists for a day until the user first interacts with it
Claude noted one manual step required:
- Open
Pills.xcodeprojin Xcode - Set your Development Team in Signing & Capabilities
- Select your iPhone 16 Pro and press Cmd+R
4 Iterate on the UI
Refine the design through quick, focused feedback
After running the app, three rounds of visual tweaks were requested. Each was a short, natural-language prompt:
Round 1: Fill the screen
Please can you make the month view fill most of the screen, with room to show current streak length etc. Also add forward/back swiping to move between months.
Claude rewrote CalendarView to use GeometryReader, distributing available height across exactly 6 week rows. Each cell now expands proportionally. Swipe gestures via DragGesture were added for month navigation.
Round 2: Adjust bar spacing
I would like a bit more spacing between the pill bars, so less height for each and more of the screen taken up thank you.
Claude replaced fixed bar spacing with Spacer() elements between the day number, morning bar, and evening bar. Bars were capped at 10pt max height. VStack spacing was tightened from 12 to 6.
Round 3: Fine-tune bar thickness
bit too narrow bars, about half way between what we previously had and what we have now thank you.
A one-line change: bar max height adjusted from 10pt to 16pt - the midpoint between the two previous values.
Notice how each refinement prompt was short and conversational. You don't need to specify code changes - just describe what you see and what you want different. Claude figures out which files and values to change.
5 Add Animations
A single sentence request adds polished month transitions
Please can we have an animation between months when swiping?
Claude added a directional slide animation with three changes to ContentView.swift:
- Added
@State private var slideDirection: Edgeto track navigation direction - Applied
.id(displayedMonth)on CalendarView so SwiftUI treats each month as a distinct view - Used
.transition(.asymmetric(insertion: .move(...), removal: .move(...)))for the slide effect
The animation is a 0.3s ease-in-out. When navigating back, the new month slides in from the left; when navigating forward, from the right.
The .id() + .transition() pattern is a powerful SwiftUI technique. By changing the view's identity (via .id(displayedMonth)), SwiftUI removes the old view and inserts a new one, triggering the specified transition animation. No manual animation state management needed.
6 Visual Polish - Dimmed Past State
A subtle change that makes today feel immediate
Let's dim the 'taken' grey on previous days
Claude updated the colour logic in DayCellView.barColor() to distinguish today's taken state from past taken state:
if taken && isToday {
    return Color.gray            // solid grey
} else if taken {
    return Color.gray.opacity(0.4)  // dimmed grey
} else if isToday {
    return baseColor             // vivid cyan/orange
} else {
    return baseColor.opacity(0.3)   // dimmed colour
}
Here's the complete visual state reference after this change:
Today - Not Taken
Today - Taken
Past - Missed
Past - Taken
Future
This small change creates a clear visual hierarchy: today's bars demand attention (vivid or solid grey), while past days recede into the background. The calendar at a glance tells you what needs your action now.
7 Generate an App Icon
Programmatic icon generation using CoreGraphics
I think we need an app icon - I'm thinking something that looks like today with no pills taken yet.
Claude wrote a Swift script using AppKit and CoreGraphics to render a 1024x1024 icon that mirrors the app's day cell design: day number "14", a cyan bar, an orange bar, and a subtle blue today-highlight border. Initially rendered on a light background.
I would prefer it to show as a dark mode icon on my dark mode phone
Claude rewrote the generator with a dark colour scheme. It also fixed a Retina scaling issue (the initial version produced a 2048x2048 image due to macOS Retina) by switching from NSImage.lockFocus() to explicit NSBitmapImageRep at 1x pixel scale.

The final dark-mode app icon
Generating icons programmatically with a script means you can tweak colours, sizes, or content and regenerate instantly - no design tool needed. The script was compiled and run in under a second.
8 Create Documentation
Architecture docs, README, and this tutorial - all generated from code context
Please create a claude.md, README.md and architecture.html (the html is design documentation - you can use Mermaid.js for diagrams).
Claude read all source files to ensure accuracy, then created:
- CLAUDE.md - Project context for future Claude Code sessions: tech stack, structure, build commands, architecture decisions, visual state table
- README.md - User-facing docs with features, setup, and usage instructions
- architecture.html - Rich design documentation with five Mermaid.js diagrams: view hierarchy, data model (ER), data flow (sequence), calendar layout, and streak algorithm (flowchart)
CLAUDE.md is special - it serves as persistent context for Claude Code. When you return to this project later and start a new conversation, Claude reads CLAUDE.md first, immediately understanding the project structure, conventions, and decisions without re-exploring the codebase.
9 Lock History to Prevent Accidental Edits
Protecting past data with a timed unlock mechanism
I want to prevent accidental edits to past days. History should be locked by default. When locked, tapping a past day shows an unlock prompt. Unlocking lasts 10 minutes then auto-relocks. A lock icon in the header provides visual state and manual toggle.
Claude entered plan mode and asked four clarifying questions about the lock UX:
- Where to show the lock icon? — Header bar (chosen), legend area, or floating button
- Unlock indicator style? — Subtle icon only (chosen), countdown badge, or pulsing glow
- Relock behaviour? — Lock immediately at 10 minutes (chosen), or show a warning first
- Default state? — Locked (chosen) or unlocked
After user answers, Claude produced a detailed implementation plan and requested approval before writing code. All changes were confined to a single file: ContentView.swift.
The implementation added these components to ContentView:
- @AppStorage persistence —
historyLocked(Bool) andunlockTimestamp(TimeInterval) stored in UserDefaults, not SwiftData — it's a UI preference, not pill data - Lock icon button —
lock.fill(locked) /lock.open.fill(unlocked) in the header HStack, with secondary/accent colouring - Auto-relock timer — a single one-shot
DispatchWorkItemscheduled for 600 seconds after unlock; on app resume, remaining time is recalculated from the stored timestamp - Guard in toggle functions —
toggleMorning/toggleEveningcheck if the date is past AND locked, storing a pending action and showing an alert - Unlock alert — "History is Locked" with Unlock/Cancel; on Unlock, executes the pending toggle immediately
Today's bars remain always tappable — the lock only applies to past days. No changes were needed to DayCellView or CalendarView.
Why @AppStorage over SwiftData? The lock is a UI preference, not medication data. Using @AppStorage avoids SwiftData model migration, keeps the data model clean, and survives app restarts via UserDefaults automatically. The 10-minute relock uses a single one-shot DispatchWorkItem — zero CPU while locked. On app resume, the remaining time is recalculated from the stored timestamp, so it works correctly even if the app is killed and restarted within the window.
Claude's plan mode approach — asking clarifying questions, producing a written plan, and requesting approval before coding — is especially valuable for features that touch user interaction patterns. The plan confirmed that all changes fit in a single file, keeping the blast radius small.
10 Add Unit Tests
Testing data mutations with an in-memory SwiftData container
I think it's time we added some tests for this project. Please add some in the standard format for an xcode SwiftUI project, that test the data updates that can be triggered by a user. Ask me if you think there are other tests we should cover.
Claude read all source files, then created a complete test target:
- Created
PillsTests/PillsTests.swiftwith 19 initial tests - Extracted the streak calculation from a private computed property to
StreakView.calculateStreak(from:)— a minimal refactor to enable testability - Hand-edited
project.pbxprojto wire up thePillsTeststarget with correct build configurations, dependency on the app target, andTEST_HOST/BUNDLE_LOADERsettings
All 19 tests passed on first run. Claude then suggested three additional tests:
- Double-toggle round-trip — tapping twice returns to the original state
- SwiftData persistence — records survive a context rebuild
- Date matching with time components — a tap at 2:30 PM finds a record stored at midnight
yes add those three as well
Claude added four more tests (two for double-toggle covering morning and evening, plus persistence and date matching), bringing the total to 23. All passed. Later, 26 more tests were added covering notification scheduling decisions, cancellation ID generation, and foreground suppression logic — bringing the final total to 49.
Testing strategy: The tests replicate the toggle logic from ContentView as helper methods operating against a real ModelContext backed by an in-memory store. This validates the exact same find-or-create-then-toggle pattern the app uses, without needing to drive the UI. The in-memory container ensures tests are fast and isolated.
Claude proactively suggested additional test cases after delivering the initial set. Asking "what else should we test?" is a great pattern — the AI can often spot edge cases (like date normalisation across time zones, or double-toggle idempotency) that are easy to overlook.
11 Add Notification Reminders
Morning and evening pill reminders with a settings page
I want reminder notifications that fire at user-configured times if pills haven't been taken yet. Tapping the notification should open the app. Add a settings page (accessed via a cog icon in the header) to enable/disable notifications, set times, and toggle the history lock.
Claude entered plan mode and designed a smart cancellation architecture. Since iOS local notifications can't run custom code at delivery time when the app is backgrounded, the approach is:
- Schedule non-repeating notifications for the next 7 days ahead of time
- Cancel specific notifications immediately when a pill is marked as taken
- Suppress notifications via the
willPresentdelegate if the app is in the foreground and the pill is already taken - Reschedule everything whenever the app becomes active
Two new files were created:
NotificationManager — a singleton NSObject conforming to UNUserNotificationCenterDelegate:
configure(with: ModelContainer)— stores container for SwiftData queries, sets self as delegaterescheduleAll()— cancels all pending notifications, then schedules morning/evening notifications for the next 7 days, skipping periods where pills are already takencancelTodayMorning()/cancelTodayEvening()— cancel a specific notification by ID (morning-YYYY-MM-DD)willPresentdelegate — queries SwiftData and suppresses notification if pill already taken
SettingsView — a modal sheet with a Form:
- Notifications section: enable/disable toggle, morning
DatePicker(default 7:00 AM), eveningDatePicker(default 9:00 PM) - History section: "Lock Past Days" toggle sharing
@AppStoragewith ContentView - Custom
Binding<Date>bridges between hour/minute@AppStorageInts andDatePicker - Handles notification permission flow: request if not determined, show "Open Settings" if denied
PillsApp was updated to create the ModelContainer explicitly in init() so it can be shared with NotificationManager.
ContentView gained a gear icon, a settings sheet, scenePhase handling to reschedule on foreground, and notification cancellation calls in the toggle methods.
Smart cancellation vs. dynamic notifications: The ideal approach would be to check at notification delivery time whether the pill was taken, but iOS doesn't allow local notifications to run arbitrary code at delivery. The smart cancellation pattern — schedule optimistically, cancel when taken — achieves the same result by leveraging the fact that marking a pill as taken requires opening the app, which triggers the cancellation.
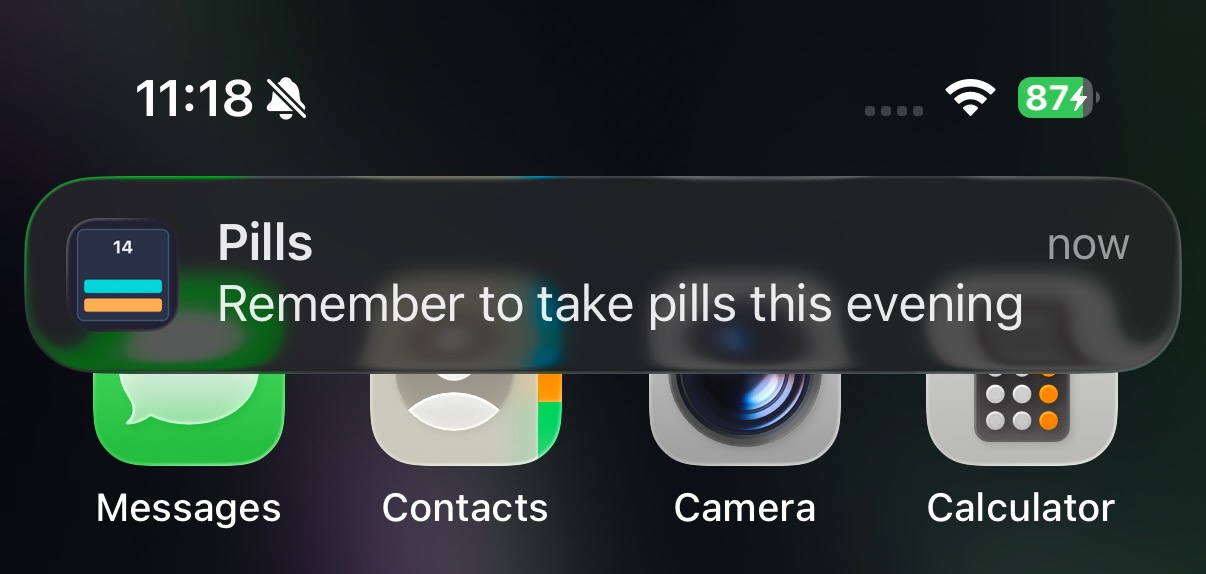
A real evening pill reminder notification on the home screen
By using plan mode, Claude laid out the full architecture — including the constraint that local notifications can't execute code at delivery time — before writing a single line. This prevented a false start with an approach that wouldn't work on iOS.
Lessons Learned
Patterns for effective AI-assisted app development
1. Start with a rich initial prompt
The first message described the purpose, visual design, interaction model, and constraints. This gave Claude enough context to make smart architecture choices (SwiftUI + SwiftData) and suggest relevant enhancements (streak counter, haptics) before writing code.
2. Let the AI ask questions
By saying "ask me questions on anything that is unclear", Claude was able to present four targeted questions that directly shaped the implementation. This avoided assumptions and rework.
3. Iterate with natural language
UI refinements were described conversationally: "bit too narrow bars, about half way between what we previously had and what we have now." Claude translated these subjective descriptions into precise code changes. Multiple rounds of feedback produced a polished result.
4. Build incrementally
The app was built in stages - core functionality first, then layout improvements, then animations, then visual polish, then icon, then docs. Each stage produced a working app that could be tested on device.
5. Verify each change
Claude ran xcodebuild after every change to catch errors immediately. The Retina icon scaling bug was caught and fixed in the same turn it was introduced.
6. Use AI for code review and debugging
After the notification feature was built and working, the app was killed by iOS for excessive memory usage. Asking Claude to investigate revealed the cause: a Timer.publish(every: 1) polling timer that fired every second for the entire app lifetime, even when the history lock was engaged. Claude replaced it with a single one-shot DispatchWorkItem scheduled only on unlock — zero CPU while locked. This kind of iterative diagnosis and fix is where AI assistance shines: Claude can reason about runtime behaviour, identify inefficient patterns, and refactor with confidence because the test suite catches regressions.
7. Use CLAUDE.md for project memory
Creating a CLAUDE.md file means future sessions with Claude Code will start with full project context, enabling seamless continuation of development.
Final Project Stats
Source on GitHub — Built with Claude Code — February 2026